
Projects & Time Tracking
Tracking time: live timer and manual entries
Start and stop the live timer, add hours manually, edit or delete time entries, and deal with overlapping entries.
Last updated
Time in TimeBill is always tracked on a task. You can run a live timer while you work, or add hours after the fact. Both create time entries you can edit later.
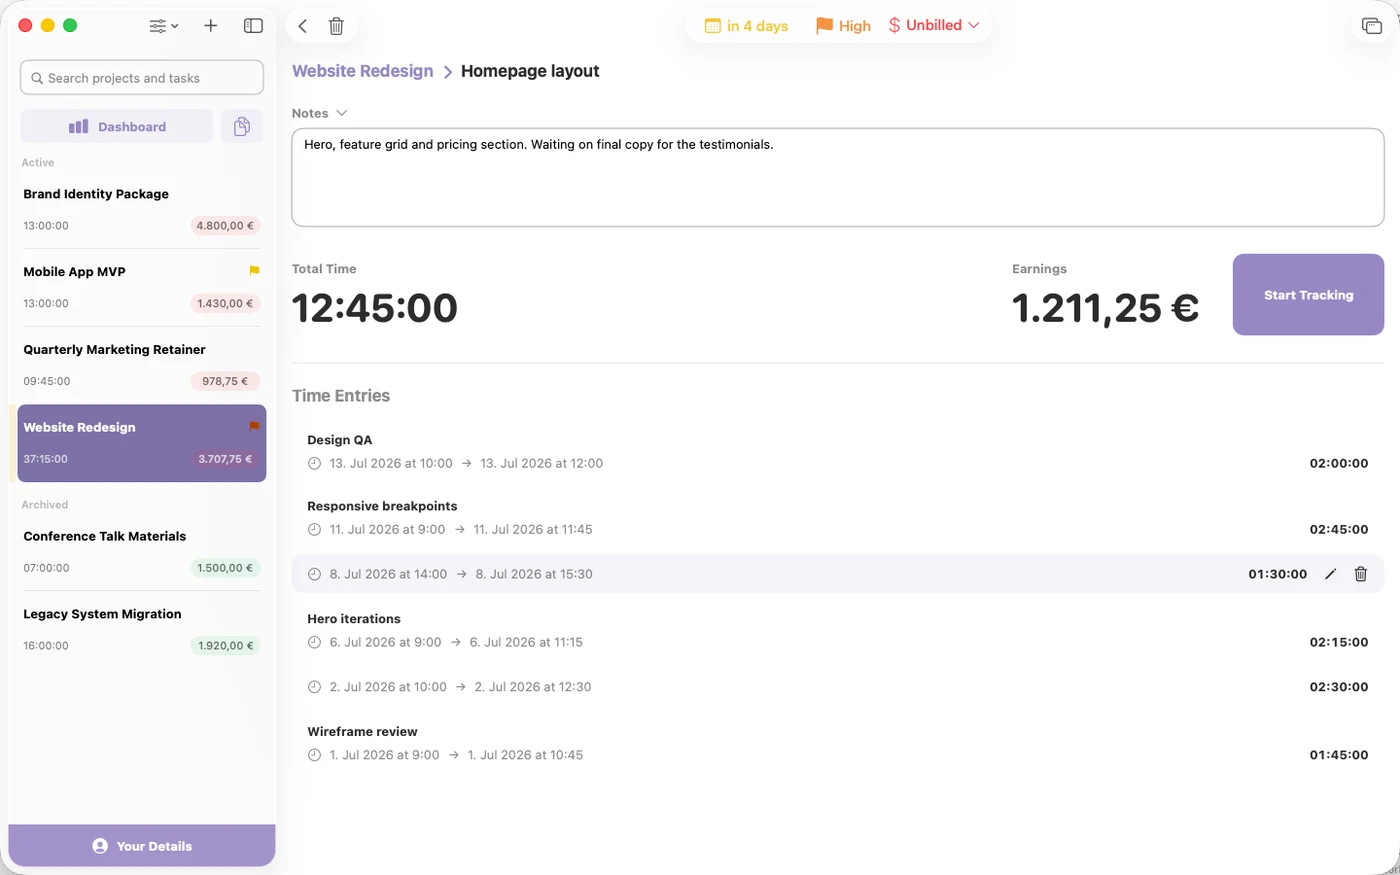
Start and stop the live timer
- Open the task (click its row on the project's Tasks tab) and click Start Tracking, or simply hover the task row and click the Start button that slides in.
- Work. The Total Time counter runs live, the row pulses, and the running entry shows an In Progress badge in the Time Entries list.
- Click Stop Tracking (or the hover Stop button) to finish. The completed entry appears under Time Entries.
You can also start and stop from the Dashboard's Continue working on card. Two things to know:
- A running entry cannot be edited or deleted until you stop it.
- Several tasks can track at the same time. TimeBill won't warn you about concurrent timers, so double-check you stopped the previous task if that's not what you want.
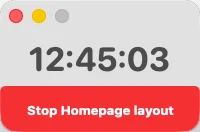
The Minimal View floating timer
In a task's toolbar, click Show Minimal View to open a small floating window with just the running time and a start/stop button for that task; the main window closes. Closing the floating window automatically brings the main window back.
Adding time manually
- Open the task's detail view.
- Hover over the Total Time counter and click the + button that appears.
- In the Add Manual Time sheet, enter the Hours as a decimal; the hint reads Enter a decimal value (e.g., 1.5 for 1 hour 30 minutes). Comma or dot both work; the value must be greater than 0 and at most 24, or Add Time stays disabled.
- Optionally fill in Notes (Optional). If you leave it empty, the entry is noted as Manually added.
- Click Add Time.
Manual entries always end now, with the start time back-calculated. To place the hours on a different day or time, edit the entry's start and end afterwards.
Editing and deleting entries
- In the Time Entries list, hover the entry and click the pencil icon (or double-click the row).
- Adjust Start Time, End Time, or Notes; the Duration readout updates live. Times save at minute precision, so seconds are zeroed.
- Click Save. It stays disabled until something actually changed, and an invalid range shows End time must be after start time.
To delete, use the hover trash icon or Delete in the editor and confirm in the Delete Time Entry? dialog. Deletion is permanent: there is no undo.
Overlapping entries
If completed entries overlap in time, an orange Some time entries overlap banner appears above the list and the offending rows are highlighted. Overlaps are allowed, but tidy them up before exporting a timesheet PDF or invoicing.
Once your hours are in, see how billing states work to mark work as billed and paid.