
Invoicing
The Invoice Vault: where your invoices live
Every generated invoice is archived in the Invoice Vault: search, filter, preview, share, print, re-export, and track payment from one window.
Last updated
TimeBill never shows a save dialog when you generate an invoice. Instead, every generated document (PDF or XML) is archived automatically in the Invoice Vault, stored on-device in the app's database. Saving a copy, sharing, and printing all happen from there.
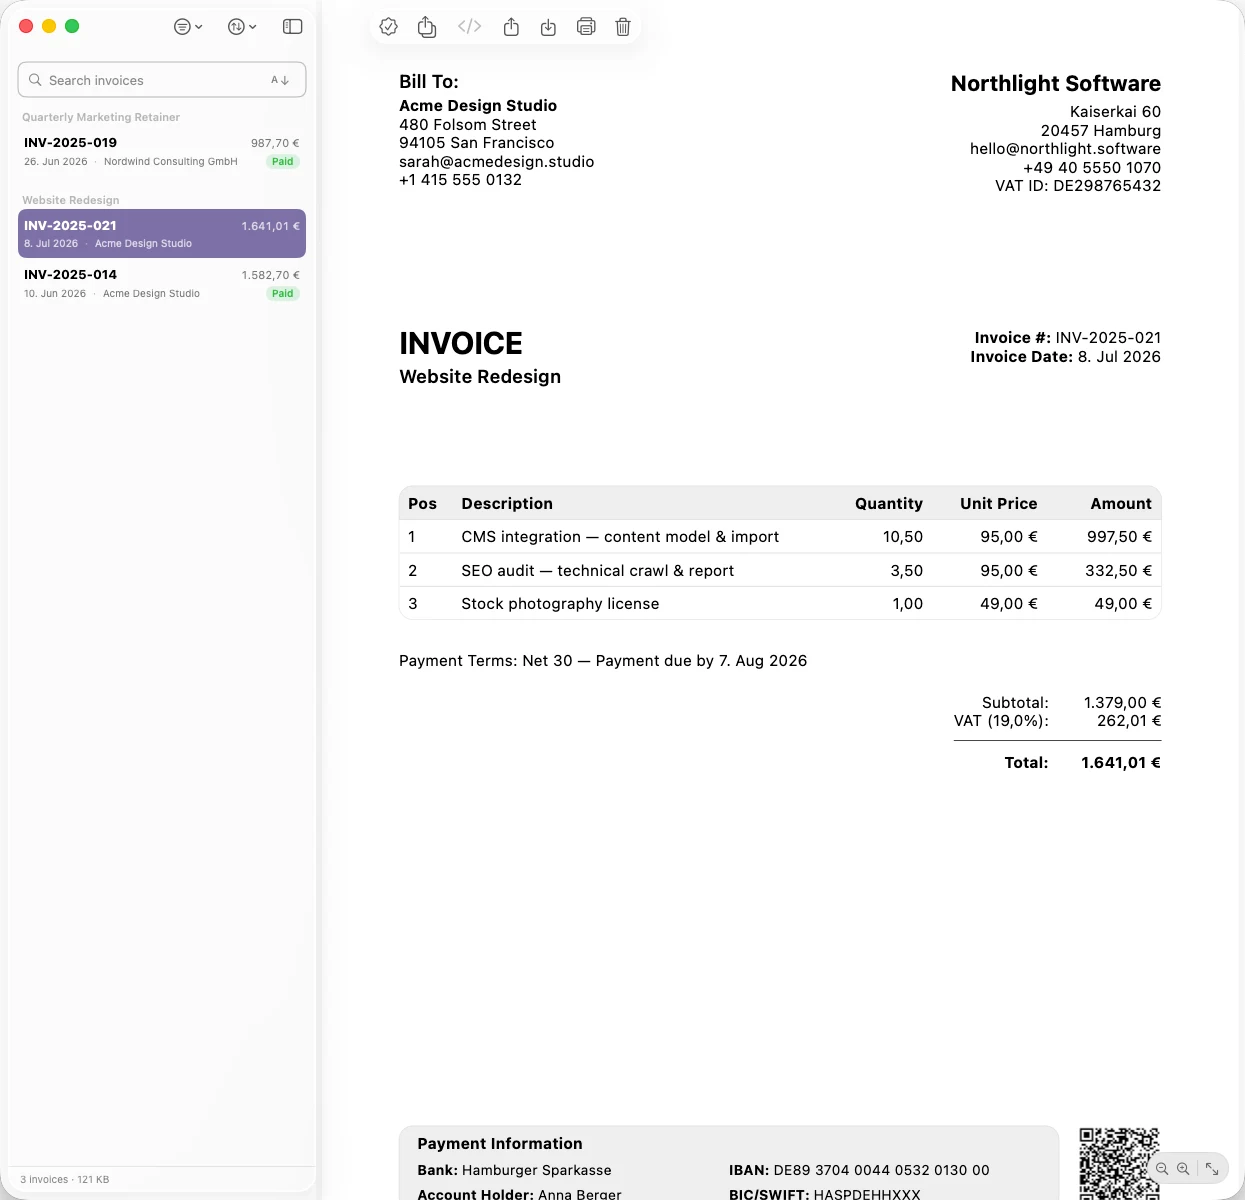
Opening the vault
Open it via the View menu → Invoice Vault, the vault button in the sidebar, or a project's Invoices footer button (which opens the vault filtered to that project). It also opens automatically after each export, with the fresh invoice selected.
Finding an invoice
- The sidebar groups invoices by project in collapsible sections. Invoices no longer linked to a project appear under No Project.
- Search invoices (⌘F) matches the number, client, filename, currency, totals, project, dates, and even text inside the PDF.
- The Filter menu narrows by project, payment state (Paid / Unpaid / Overdue), or document type (PDF, ZUGFeRD or Factur-X, XRechnung); Clear Filters resets.
- The Sort menu orders by Invoice Date, Due Date, Amount, Client, Invoice Number, or Archived Date.
Each row shows the invoice number (red when overdue), total, date, client, a format badge (e.g. "ZUGFeRD 2.5"), and a green Paid badge.
Working with an invoice
The detail pane shows a zoomable PDF preview, or a code-style XML view for XRechnung files. For hybrid ZUGFeRD/Factur-X invoices, the E-Invoice Data toolbar toggle reveals the embedded XML.
From the toolbar or the right-click menu you can:
- Share: send via the macOS share sheet.
- Re-export: save a copy as a file anywhere you like.
- Print (⌘P), Quick Look (Space), and Copy Invoice Number.
- Export All: bulk-export to a folder of your choice. Careful: it exports exactly the currently filtered or searched set, not necessarily everything.
- Delete: permanent, with the confirmation "This cannot be undone."
Tracking payment
Click the Paid seal button in the toolbar (or right-click → Mark as Paid). This stamps a paid date and automatically flips every contributing task in the project to paid; Mark as Unpaid returns them to billed. The sync works both ways: when all of an invoice's tasks are marked paid elsewhere in the app, the invoice marks itself paid too. Invoices whose tasks no longer exist behave manually. See how billing states work.
An invoice is Overdue when it is unpaid and past its due date: its number turns red and the toolbar shows an overdue indicator.
Good to know
- Re-generating with the same invoice number replaces the archived record in place (see Correcting and re-issuing an invoice).
- Deleting a project does not delete its archived invoices: they are kept as standalone financial records and move to a No Project group in the vault (archiving vs. deleting projects).
- The vault footer shows how many invoices are stored and their disk usage. If a preview or export fails with an error, see Invoice Vault errors and how to fix them.