
Invoicing
Setting up your company details
Enter your company information, logo, bank details, and e-invoicing settings in the Your Details sheet so TimeBill can generate invoices for you.
Last updated
Before TimeBill can generate an invoice, it needs to know who is sending it. Everything about you as the seller lives in one sheet: Your Details. Until it is filled in, the Generate Invoice button in every project stays disabled; clicking it shows the hint "Set up your company details first."
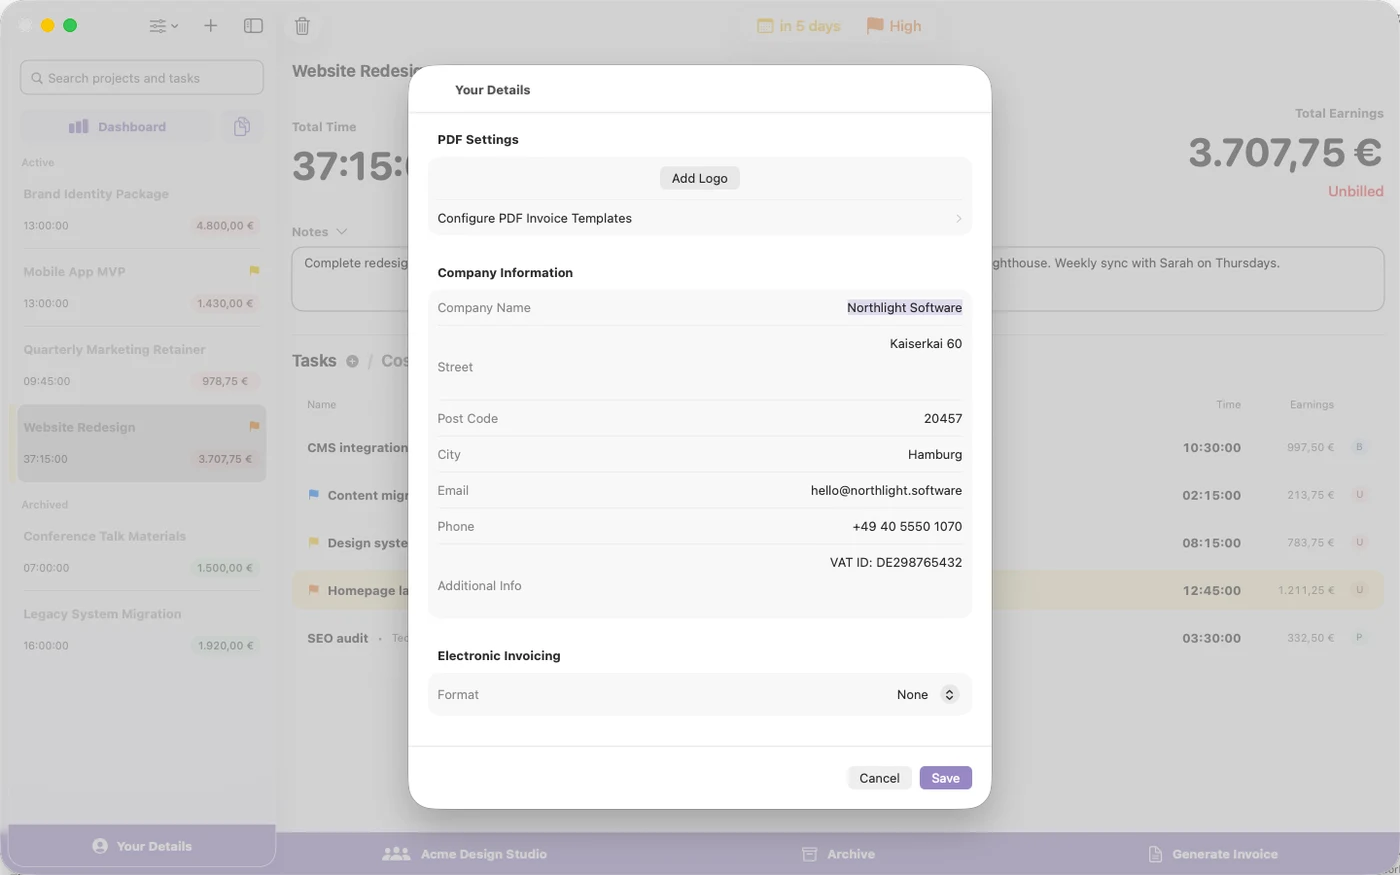
Open Your Details
- Click Your Details at the bottom of the project sidebar.
- The sheet has four sections: PDF Settings, Company Information, Electronic Invoicing, and Payment Information.
- When you are done, click Save in the toolbar. Cancel discards everything you changed since opening the sheet. Unlike the customer editor, nothing here is saved automatically.
Company Information
Fill in Company Name, Street (can span multiple lines), Post Code, City, Email, and Phone. The printed invoice address is composed from these structured fields: the street lines first, then post code and city on one line.
Additional Info is free text that also appears in your details block on the invoice. Tip: your VAT ID is never printed on the classic PDF invoice (it is only embedded in electronic invoices), so if you want it visible on the PDF, add it to Additional Info.
Add a logo (PDF Settings)
- Click Add Logo and pick any image file.
- TimeBill copies the image into its own storage, so you can move or delete the original file afterwards.
- Once set, the buttons change to Change Logo and Remove Logo.
The logo is drawn in the invoice header next to your details, up to 60 pt tall. The Configure PDF Invoice Templates button in the same section opens the template editor. See Customizing invoice templates.
Payment Information
Enter Bank Name and Account Holder, then choose the Account Type. SEPA (EU) is the default; US Banking, UK Banking, BSB (Australia), IFSC (India), CNAPS (China), and Zengin (Japan) are also available. The account fields relabel to match: IBAN and BIC/SWIFT for SEPA accounts, Account Number plus ABA/Routing, Sort Code, and so on for the others.
If you leave the bank fields empty, the payment section is simply hidden on your invoices. Details on the scan-to-pay QR code are in Payment details and the SEPA QR code.
Electronic Invoicing
The Format picker in this section turns e-invoicing on or off (choose None for plain PDFs). German and French sellers can generate ZUGFeRD, XRechnung, or Factur-X documents (see Electronic invoicing: ZUGFeRD, Factur-X, and XRechnung).
This section also holds the small-business VAT exemption toggle, named after your country's scheme (Kleinunternehmer (§ 19 UStG) in Germany, VAT exempt (franchise en base, art. 293 B CGI) in France, VAT exempt (small business scheme) elsewhere) with an editable, prefilled Exemption Note. Be aware that the note is embedded only in electronic invoices. To show it on the printed PDF pages too, add the sentence to Additional Notes when generating an invoice.
Good to know
- Company details (including bank data) are stored in TimeBill's preferences on this Mac, separately from your project database. They are not included in a projects JSON export, so re-enter them when moving to a new Mac.
- Older single-field addresses from previous versions are migrated into the Street field automatically.